Showing posts with label Abstract Painting. Show all posts

5/9/10

Collaboration between V & V: "Red Moon Rising"


"Red Moon Rising" 3 canvas 18"x 24" each

CLICK HERE TO BID

The very first collaboration between the two V's! What fun this has been. I had painted the blossom's and tree, but the painting seemed to lack 'punch! On a whim I passed it on to my daughter, Veronica, saying ". . . try your hand at saving it!" Which she did! And quite beautifully as well, I might add.

Not too bad having realism in painting and a flare for the abstract living under one roof. Plus, Veronica's husband, Cory, has become quite the one for coming up with innovative names!

5/5/10

Veronica Strikes Again: BLOCK PARTY

"BLOCK PARTY"
2 Canvas Acrylic: 36"x24"x3/4" & 18"x24"3/4"

CLICK HERE TO PLACE BID

When this girl of mine paints a winner it really comes across strong. I am loving these coming from Veronica's Pool House Studio . . . maybe it's the sound of lapping water that so inspires her! LOL! I know that I still miss the sound of lapping waves in early morning. Got so spoiled living on either coast (and I do mean 'right on' either coast), nothing like the sounds of surf when just waking up.

Anyway, we are placing this one on eBay as well, and really do not expect it to be there very long at all. Unless I really, really miss my guess, it should be gone in first 10 days of offering! Will be interesting to watch anyway . . .

4/21/10

Veronica Is Joining Me on eBay


"SUMMER RAIN"
SOLD
3 Canvas each 12"x12"x3/4"

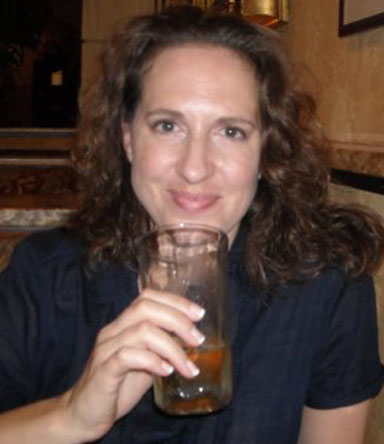
The most recent addition to my ongoing work in progress is my daughter Veronica Laflin, now adding her artistic offerings to my own on eBay. I must say, she paints in Pastel, which is very different from my own, as well as being quite Abstract. A welcome change of pace I must say, and something fairly exciting as well.

Here is her beautiful face smiling back:

3/21/10

Another Watercolor Painting on Canvas:

IMAGE AND TEXT ARE BOTH COPYRIGHT PROTECTED

"OLD ROCKY LEDGE ROAD" 18" x 24" x 3/4" Deep--ORIGINAL WATERCOLOR
CLICK ON TO PLACE BID

This one is a personal favorite. As many know, the longer one keeps a Painting the more fold of it you grow. . . which is exactly the case here. This Painting was never framed, and has never been displayed as for sale in a show, therefore each time I have thumbed through raw Paintings through the years, I would pause and look. Have grown very fond of this special piece, which is now mounted onto Gallery Wrap Canvas, and ready for sale. Good luck to any bidders on this truly special piece of my heart.

12/4/09

Newest 12x12 inches mounted on canvas

Click Etsy Badge On Right To Order
This one makes me very happy while looking at it here in my Studio. Don't know what else to say about it, other than it was satisfying to work on!

10/27/09

24"x30" Watercolor Stretched like Oil. . .

This Watercolor is painted on 140 lb. Cold Press Archers Watercolor Paper stretched in normal way, i.e. flat, stapled around edges to a flat board. I have left at least 1.5" around each side of planned painting size in order to compensate for the 7/8" deep sides after mounting. I Paint first, especially in these larger size paintings for two reasons, as mentioned in yesterdays entry: to prevent buckling later, and to mount only finished paintings that I like.

"Last Blossoms Of Summer"
24" x 30" Varnished Watercolor -- Ready to Hang.


Here are two side photos of the painting showing how edge wraps around all sides. Their are no staples in the Watercolor Paper itself.
The staples showing on very back of stretcher frame are actually in canvas, which has been stretched over stretcher bars first, and now lends strength and stability to the Watercolor Painting itself.

Next I will post step by step mounting process of paper over canvas for precision stretching each time.

10/20/09

Stretch Watercolor Paper? Yep, The Real Thing!

Oh, I know there are ways to paint with Watercolor on Canvas that already out there, and some is very nice to work with indeed. However, just have not been able to use Watercolor as I can by painting on paper! Was never quite satisfied with the end product as a result. So, have been working on being able to stretch Watercolor Paper like canvas for quite some time: this is my very first totally successful Watercolor Canvas!!!!!

Yep, 140 lb. Arches Cold Pressed Watercolor Paper stretched like canvas. Will be interested in what you think.

I had not painted my painting quite wide enough for this 12"x12" stretched, which left the thin white edge on each side. Will have a large Painting finished in a few days. Will post it after stretching as well.

10/9/09


Love this Painting over-all, even though I spent far too much time working on it for what was involved. Was not the paintings fault, however, had taken on too many tasks for working time allowed! So, now it's on eBay for low, lower, lowest Auction! Large, really great Original Painting . . . worth taking a look.

go to eBay: check auctions

9/3/09

Fun New Painting--Water Soluble Oils


This Painting was great fun to accomplish, although it took me quite awhile to finish. Had no idea where I was going with this when I began laying it out, so felt my way along gradually, adding areas that seemed to fit together, one at a time.

8/1/09

"Time Won't Let Me"

The really fun thing about Water Soluble Oil is the complete freedom one feels, while still ending up with a strong final finish. I am using traditional 2 parts Liquin Original by Winsor&Newton/1 part Odorless Paint Thinner for use over this Oil. a very important step!! Cannot stress this enough, for without the use of this Liquin mixture, Water Soluble Oil will lift the very next time it is glazed over. However, once applied, this finish brings out the beauty of oil applications, as well as aiding in deep, quick drying overall. Let each glaze dry overnight, apply Liquin mixture before giving it 2 to 3 days to set, and one can feel assured that your painting is totally dry.

First I sketch my Center of Interest onto
plain white bond ink jet paper, in this
case a sitting nude. This will be placed
printed side down onto prepared canvas, so
remember that you will end up with a mirror
image once applied. Sketch in graphite,
print, and then go over your printed image
with rich charcoal pencil, bring out highlights
as you go.

Next, apply a layer of Matte Medium to
area where your sketch will be applied. I use
Liquitex brand, but any brand of Medium will work. (This is another place I find Water Soluble Oil especially helpful. The water
soluble nature of this Oil, inter-changes well
with acrylic and acrylic medium if desired.) Place
sketch printed side down so it adheres to Matte Medium. . . gently smooth out wrinkles, leave until totally dry.


Once dry, begin a gentle re-wetting of entire printed sketch. I use a soft brush, but some use a wet cotton cloth for this purpose. As paper becomes soaked it will begin to ball-up and lift off, leaving a combination of print & charcoal behind.

Here you can see remaining white of bond paper, along with the transferred sketch. At this point you can evaluate for yourself whether additional sketching w/ charcoal is needed, or whether imprint remains strong as transferred without further touching up. Before I begin the process of skin tones, background coloring, etc, using Water Soluble Oil, I give a quick spray of fixative so charcoal won't smear.

At the same time I have begun to develop remainder of my triptych, adding pressed on leaves coated with Gold Gesso, and a random pattern of 'numbers' where my melting clock will be placed. For this is use the same print/charcoal/apply method I had used on the nude, remembering, of course, that 'numbers' will also be applied in mirror image. I have used computer graphics for my printed image this time rather than a sketch.

I continuing to develop my triptych leaf by leaf, clock by clock, but you may use whatever motif you choose to depict. The smaller Burnt Sienna leaves are stamped on using Water Soluble Oil, while 'numbers' of second clock have been printed in Burnt Sienna, and applied in same method as before.

The tree had been mapped out using a layer of thick basic gesso prior to overall
application of Buff Titanium Gesso, by Daniel Smith. Love working with these colored Gesso in combination with the Water Soluble Oil!!!! After everything is well dried, rubbing a piece of charcoal was used to indicate flow of tree trunks and branches.

And finally, blue marbling is accomplished by dropping Acrylic Flow Releaser,
also by Daniel Smith, into a layer of Cerulean Blue Water Soluble Oil. The paint will pull away from Flow Releaser, disrupting the surface to create a random pattern of rings and disrupted paint. Frilled edges around circle are stamped out as well, with assorted spots of black and white Oil Paint, or even black and white Gesso, being randomly added.

For more wonderful ideas and tips to help explore your own potential creative genius see THE CREATIVE EDGE by Mary Todd Beam. In this wonderful, informative book Mary covers exciting techniques from fifty-some contributing artists, while including works of her own, along with helpful hints and instructions.

7/22/09

Water Soluable Oil --- Abstract/Pop Art

(click image to enlarge)

"Time Won't Let Me"---water soluble Oil---place bid
I have been doing a fair amount of working with this radical new medium, and have to say that I like it. Now, admittedly I am a Watercolor Artist first and foremost, and have limited work experience in traditional oil. Perhaps this fact alone serves to make me more adaptable to this medium that most. For whatever reason I am finding it versatile, easy to work with, and love being able to produce some Watercolor feeling while working on Canvas.

5/22/09

Water Soluble Oils . . .can you believe it????


Why so long between posts? Good question, have been asking myself that very question for quite some time. Is it that I don't 'like' to share? Nope, not at all. In fact, when it comes to my art most are hard pressed to keep me from it. Lol! Is it that I just don't have the time? Probably closer to the truth, although, if I weren't so long winded that would help too.

Anyway, I will pledge here and now to do better. Try to do better maybe? No, diffinitely to do better, for sure. . . Promise!

So, what I have been up to is still Oils, more specifically the Water Soluble Oils to be exact. Yep, finally realized that what was holding me back with Oils was not the chemical fumes, length of drying time, or need to stretch canvas. What was holding me back from advancing further and enjoying my work more while working with Oil boils down to one simple fact; I am a Water-colorist, pure and simple. And along with this realization, logic would then dictate that I try Water Soluble Oils, right?

Well, I am here to tell you that this took some doing. #1, I have not been working in Oil long enough just yet to know all of the in's and out's of Traditional Oil, let alone a medium so seemingly contradictory all by itself as "Water" and "Oil" naturally are. So, there goes my time right there. . . right? Experiment, play, experiment some more. . . get the picture. Finally I got smart and asked an artist friend who regularly works in oil for some advice.

Now here I go, getting long winded again. Let me just show you a couple of Paintings I am proudest of at the moment-- One is at the top of this post, named "Sunflower Pot". What else? The second is Sunflowers as well--


So there you go. . . two Oil Paintings, and both done with Water Soluble Oil. And I totally enjoyed painting both.

Both of these Paintings have Sold.